


2.Installation
Thanks to kusogaki77 for the installation wiki pages
Note: for non blueprint projects that already have source skip to step 4, also you can clone the repository instead of downloading a zip file if you wish.
It’ll walk you through the process of determining your project version and getting the right plugin working for it.
If you’re not using the pre-built plugin, you will have to build/compile the plugin yourself. And to do that you will need to install a compatible Visual Studio version for the engine version you are using and set it up for UE4.
##If you are working off of the Example Template then skip to step 6!##
STEP 1
- Install Visual Studio
(Either version must have C++ Programming Language support enabled.)
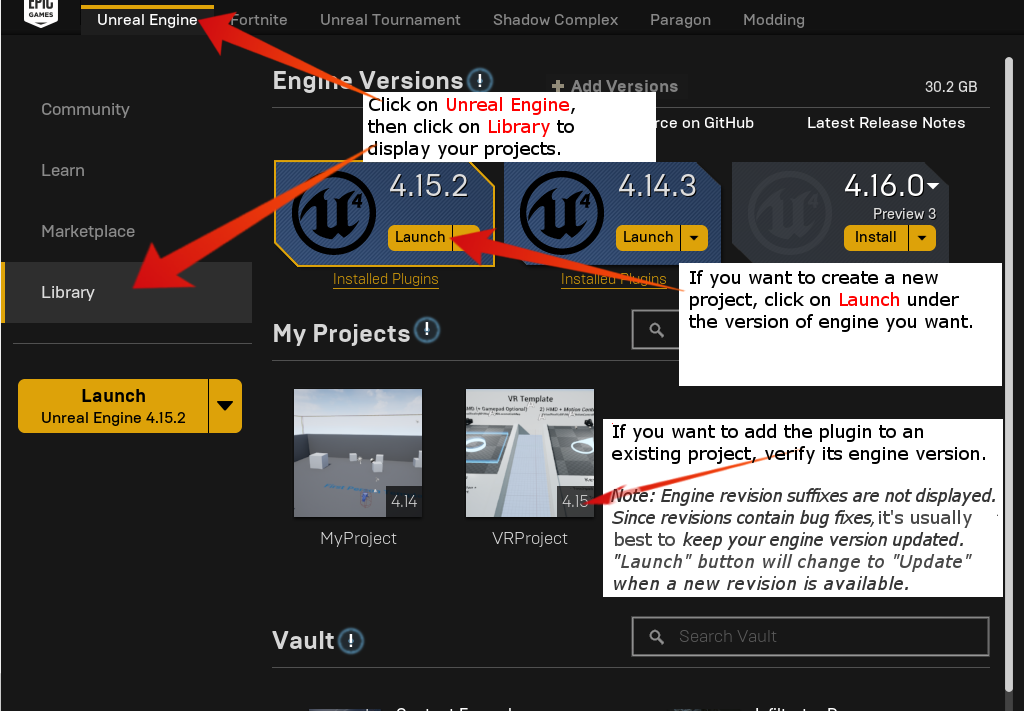
STEP 2
- Launch the Epic Games Launcher and sign in.
- Then verify the engine version of the project you want to add the plugin to.

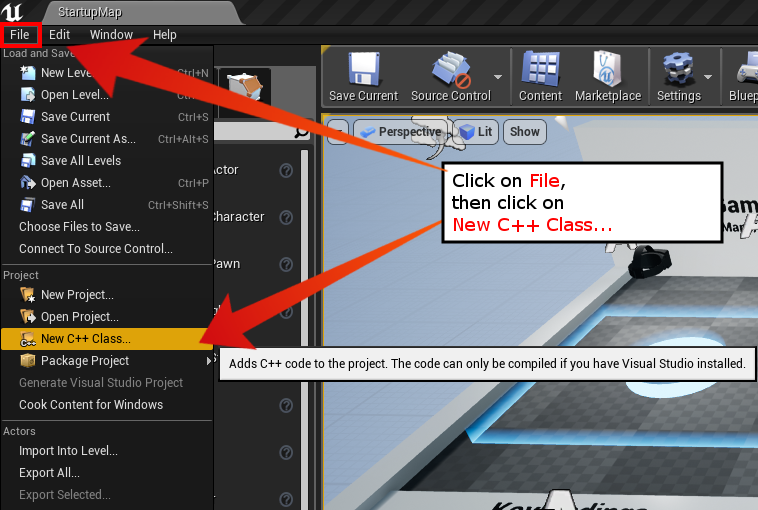
STEP 3 (FOR BP Only projects, C++ projects can skip this step)
- Launch the project.
(If it’s a new project, it’ll launch automatically after you follow the steps in the screenshot for Step 2)
Once it’s open, create a new C++ class.

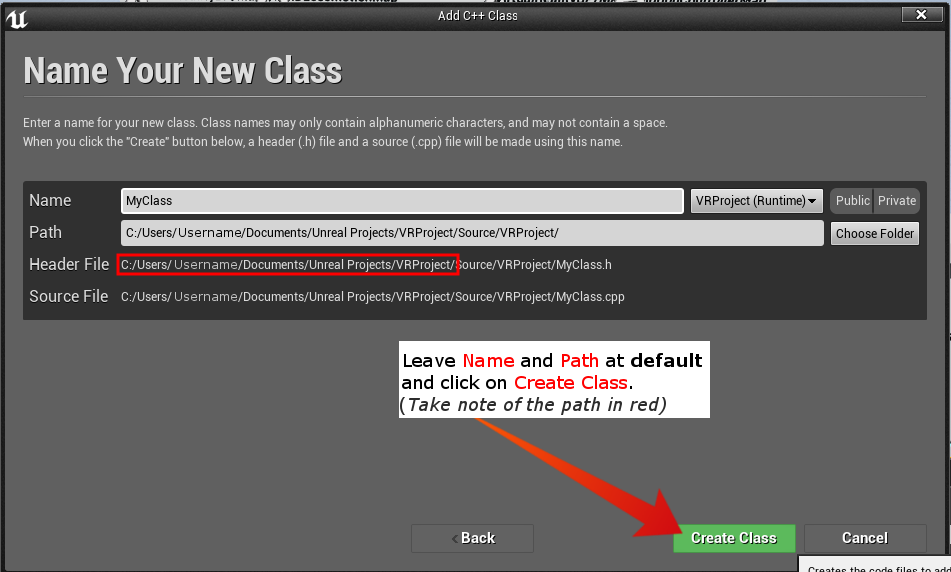
- When it’s done, save the project and close it.
(If there are errors, it’s likely because C++ components were not installed in Visual Studio. You have to rebuild the solution anyway though, so just make sure you install C++ before you try to continue from Step 10)
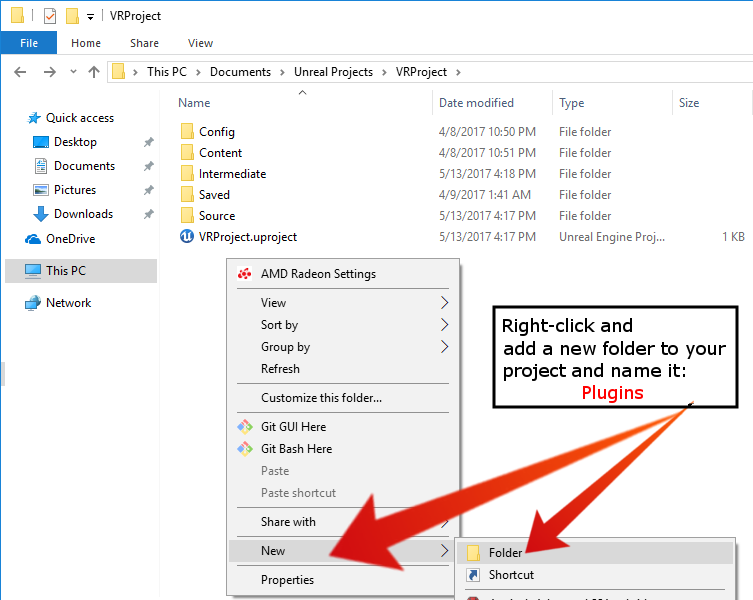
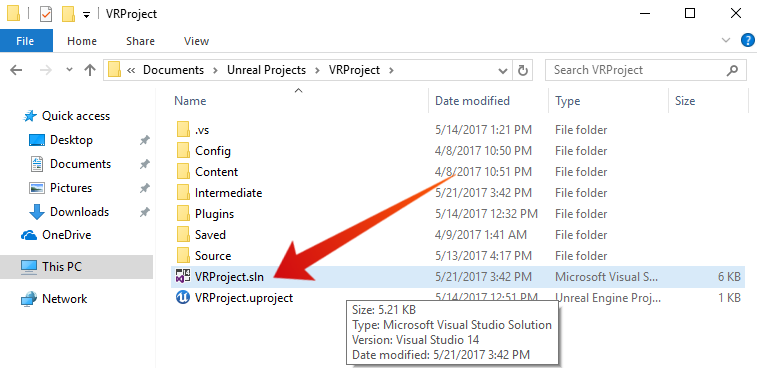
STEP 4
- Create a Plugins folder in the project folder (i.e., part of Header File path in red in Step 3 screenshot.
(By default, Unreal Engine saves projects at Users/Username/Documents/Unreal Projects. Go there and open up your project folder.)
STEP 5
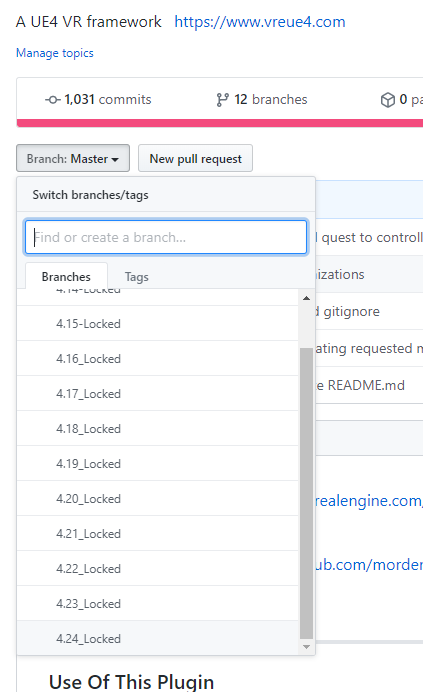
Download the zip file for the version of the plugin that is compatible with your project. Either by cloning the repository, downloading a specific branch, or downloading one of the pre-built binary packages.
In github to download a specific branch open up the branch selection and choose your engine version (master is always latest released engine version, so use that for current engine).
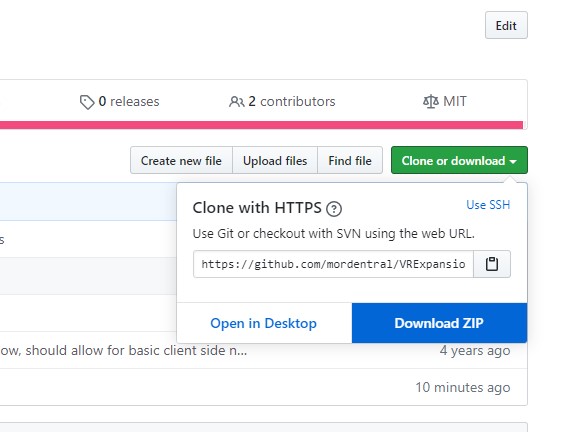
And then click on the CloneOrDownload button and choose DownloadZip
Copy the folder in the zip file to your project/plugins folder
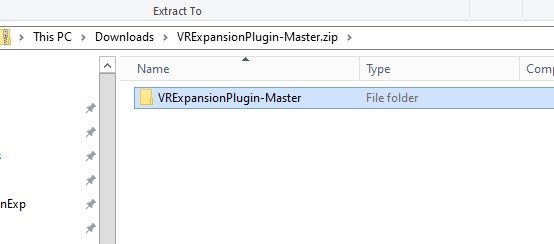
Typically you should remove the branch name from this folder name (in the image case rename it to VRExpansionPlugin).
STEP 6 (If using the example start here)
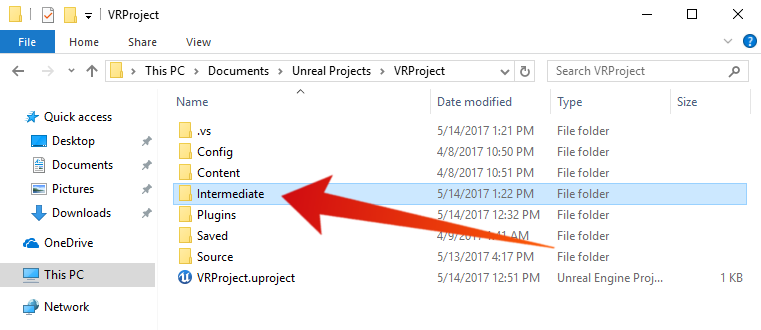
If upgrading versions fully delete the old folder prior to adding the new one in, and also you may want to delete the intermediate folder in your project and then right click on your projects .uproject and regenerate project files.

If you receive errors make sure to check the following:
- Project Engine version matches the plugin version
- C++ Programming language is installed
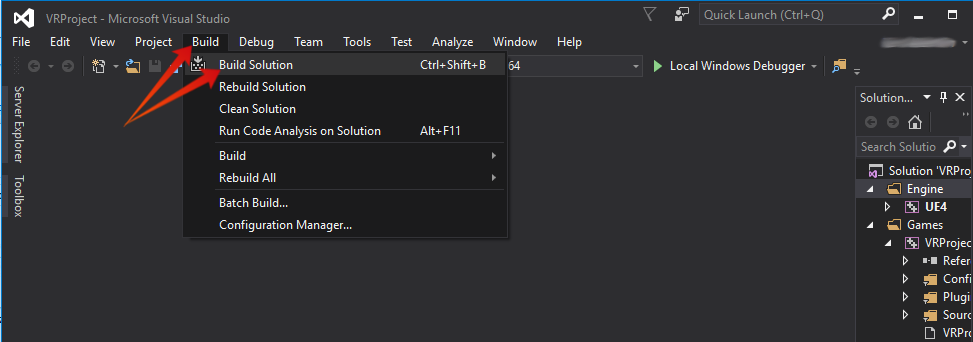
STEP 7
- Double-click the generated sln to make it open in whichever VS version you had set up in Step 1.
STEP 8
- Make sure that the build target (drop down box next to win64 in the SS) is set to Development Editor (this is what the editor uses by default).
- Click on Build > Build Solution.
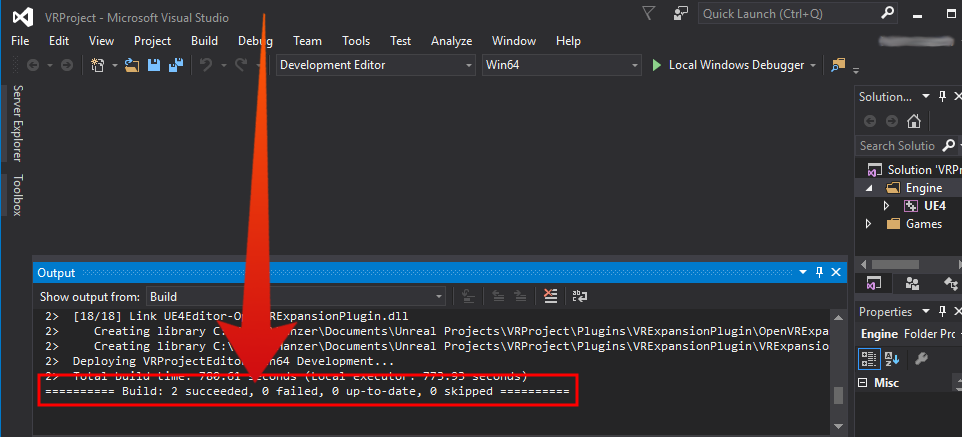
- Wait for it to finish. (Should take anywhere from 5m to an hour.)
If it finishes with no errors, it’ll look like this:
STEP 9
Launch the project and use the VRExpansion Plugin.