
1.Intro
1.1.Pre-Setup
1.
If you are running the module WITHOUT VRExpansionPlugin and are not using the branch specifically intended for this, then open up OpenInputPlugin.build.cs and change the line
bool bCompileWithVRExpansion = true;
to
bool bCompileWithVRExpansion = false;
This will cause it to no longer compile against my primary plugin and to act standalone. You will also want to remove the reference to it in the OpenInputPlugin.uplugin file.
2.
The skeletal action names used are below (auto set if the skeletal action name is blank):
/actions/main/in/skeletonleft
/actions/main/in/skeletonright
I am setting the plugin to default to these for now when none have been provided by the end user.
You can access the local binding interface from your desktop here:
http://localhost:8998/dashboard/controllerbinding.html or by following the link in this websites menu to it (added for convienance).
1.2.Main Setup
You may want to get the knuckles controller profile from the latest template (if using the VRExpansionPlugin).
Also I am also packaging the OpenInput testing hands as they are pre-rigged and fully setup already and they look 100x better than pretty much all stock hands for ue4. When using ue4 hands you likely will want to turn off bone morphing in the settings as they likely won’t be rigged correctly for it.
1.
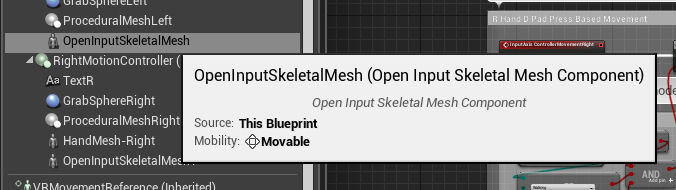
Load in and go to your pawn, under each motion controller add an OpenInputSkeletalMeshComponent
Add at least 1 skeletal action to the skeletal action array and set its hand type (Left or Right under SkeletalData)
If you have a custom action manifest generation then add the action names in, if you do not then they will be auto filled with my defaults.
Leave the rest of the settings default for now.
2.
Set the mesh and animation blueprint for the mesh
Open up the animation blueprint for your hand meshes
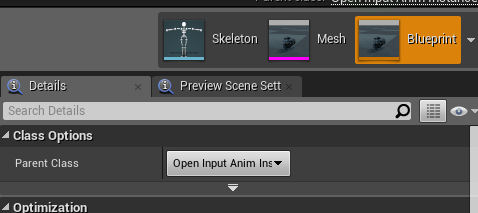
Click on “ClassSettings” on the menu bar
Re-parent the class to the OpenInputAnimInstance class
3.
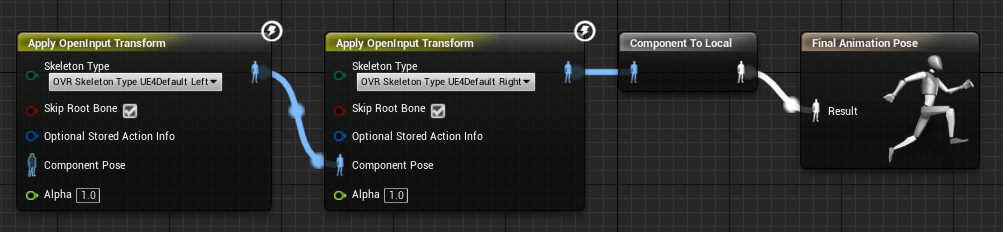
Go to the Anim graph for the anim blueprint and drop in a Apply_OpenInput_Transform animation node
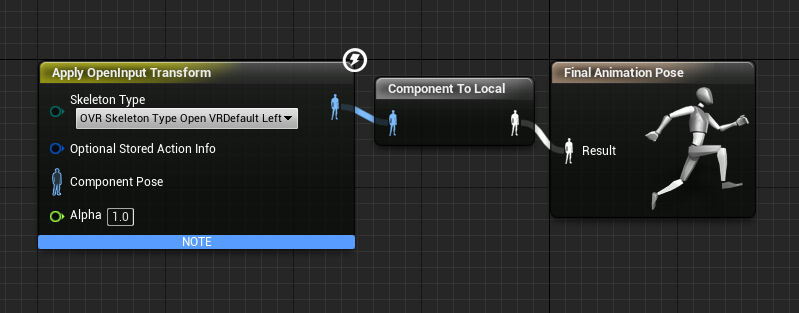
Hook up the output to the final animation pose input
Change the drop down selection to which hand right/left it is (I may automate the hand type at some point) and which skeleton to use OpenInput/UE4
You can also manually map a new skeleton but that is for advanced use.
4. Full body setup
If you are doing a full body setup you will need two skeletal actions and two Apply_OpenInputTransform nodes in the animation graph, one for the left and one for the right hands.
You will also likely want to tick on bSkipRootBone on these nodes so that the wrist isn’t moved (unless you have a proxy bone where the wrist is to allow controller offsets).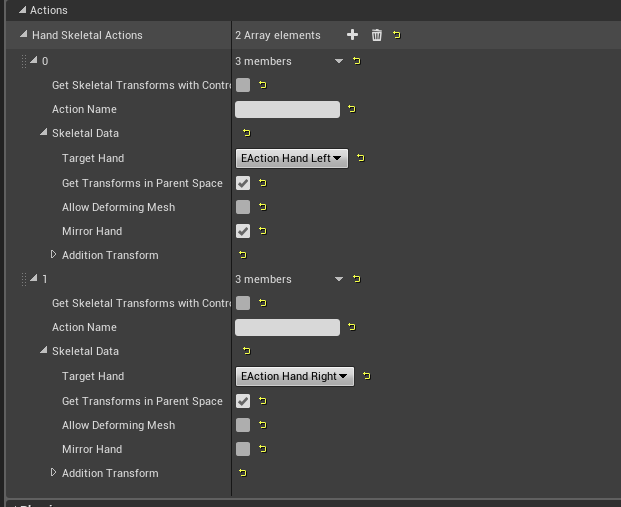
Also for the left hand you will likely need to tick the “MirrorSkeletal” boolean on the action struct as the OpenInput skeletal data is not setup for inverse directions.
You also will want GetTransformsInParentSpace true and AllowDeformingMesh false (if the hand mesh isn’t weighted and rigged correctly).
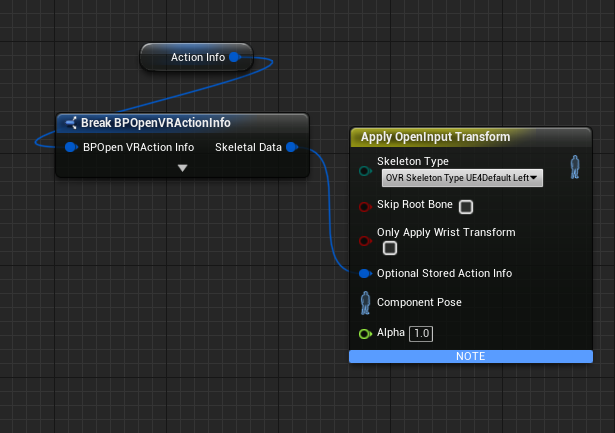
1.3.Manual Pose Retrieval
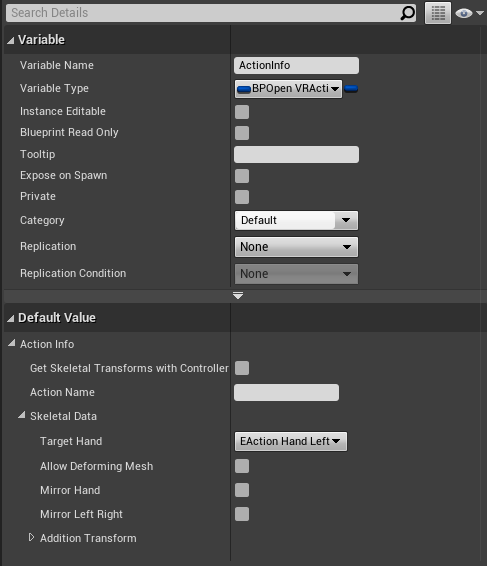
If you want to manually retrieve and apply a pose to a mesh (you don’t want to use the OpenInputSkeletalMeshComponent) then you can first create and store a variable of type BPOpenVRActionInfo and set the default settings up in it.
Then in your UpdateAnimation event for your animation blueprint, query for the current pose. This will store the current pose values in the variable that you created, if you intend to replicate the variable you will also likely want to get the compressed data and/or the gesture values (curl and splay values).
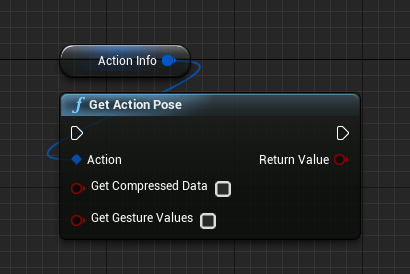
In the actual animation graph itself, you then call the ApplyOpenInputTransform node like normal, except you pass in your custom structure to it.
1.4.Custom Skeleton Mapping
Coming soon – ask me directly if you need help with this until then, it does currently work.
2.Input Mapping
The SteamVRInput system is a robust and flexible input re-mapping setup, allowing users and devs to define profiles for all supported controllers and even set up legacy profiles to support older games as the system upgrades.
It uses the concept of “ActionManifests”, lists of actions in a JSON format that the program uses and expects bindings to be assigned for. The developer is to supply the default mappings per controller for this list. The end user is also capable of overriding the default mappings, or creating entirely new mappings for new controllers or hardware that didn’t exist at the time of the games creation or that the developer did not have access too.
The input style and methodology is very close to the OpenXR spec that has recently been released and it should very seamlessly merge in with it when the time comes I assume.
If you are interested in the actual line by line format of the action manifest you can find more information here:
https://github.com/ValveSoftware/openvr/wiki/Action-manifest
As generally the developer shouldn’t need to directly interact with this file. I will walk you through a very basic input mapping / setting default profiles for a controller that you can ship out with your game.
2.1.Initial Setup
Prior to starting mapping you will need to do a few things.
The manifest is generated on program launch (every program launch) by UE4 at the ProjectConfigDirectory.
The default bindings files are generated only in editor, and only if they don’t already exist. You are expected to ship these with your packaged game. They exist in projectdir/config/SteamVRBindings alongside the manifest.
Then to make sure that you have access to all data and the ability to easily overwrite the default bindings, you should open up SteamVR, go to the Settings tab and enable the pictured field, it will enable the advanced developer controls.
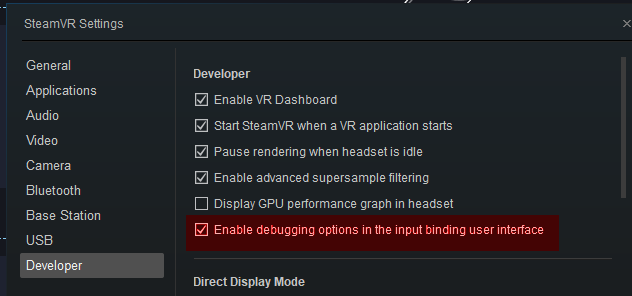
Once this is enabled you can either load up the bindings interface in the settings menu in VR. Or you can follow this link (also a shortcut in this website menu) to load the browser version.
http://localhost:8998/dashboard/controllerbinding.html
You will see the binding interface.
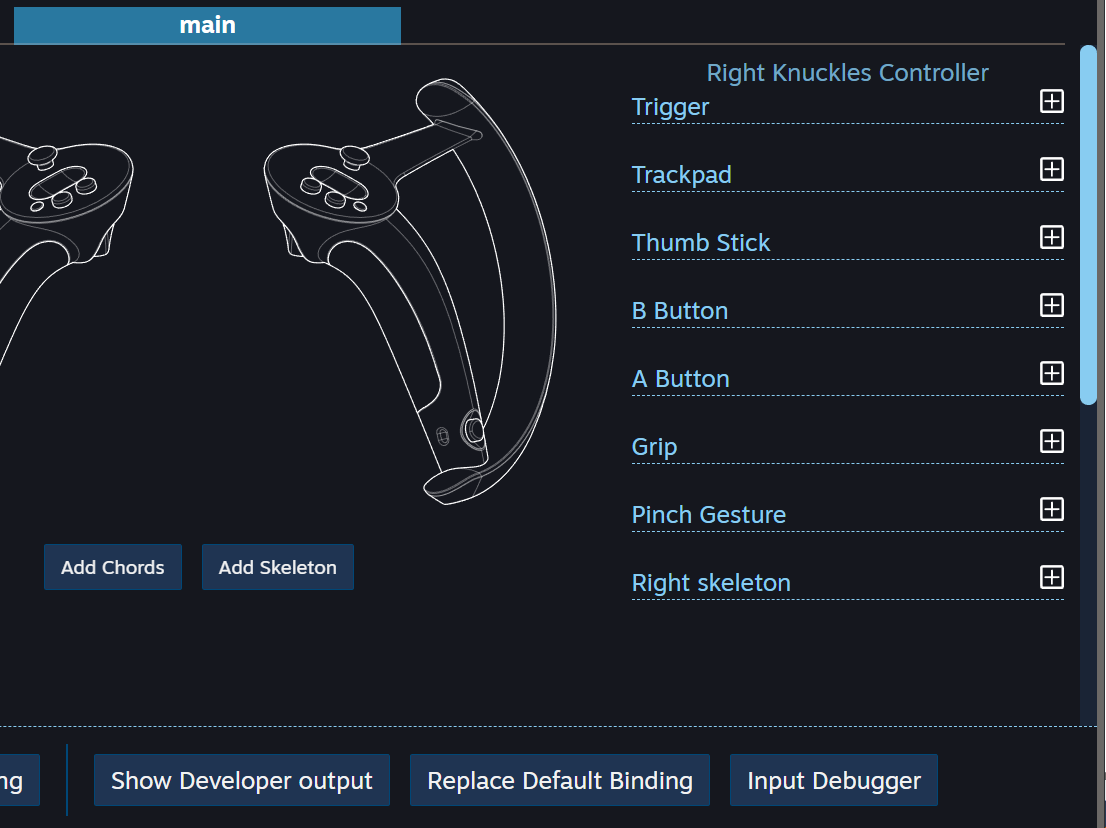
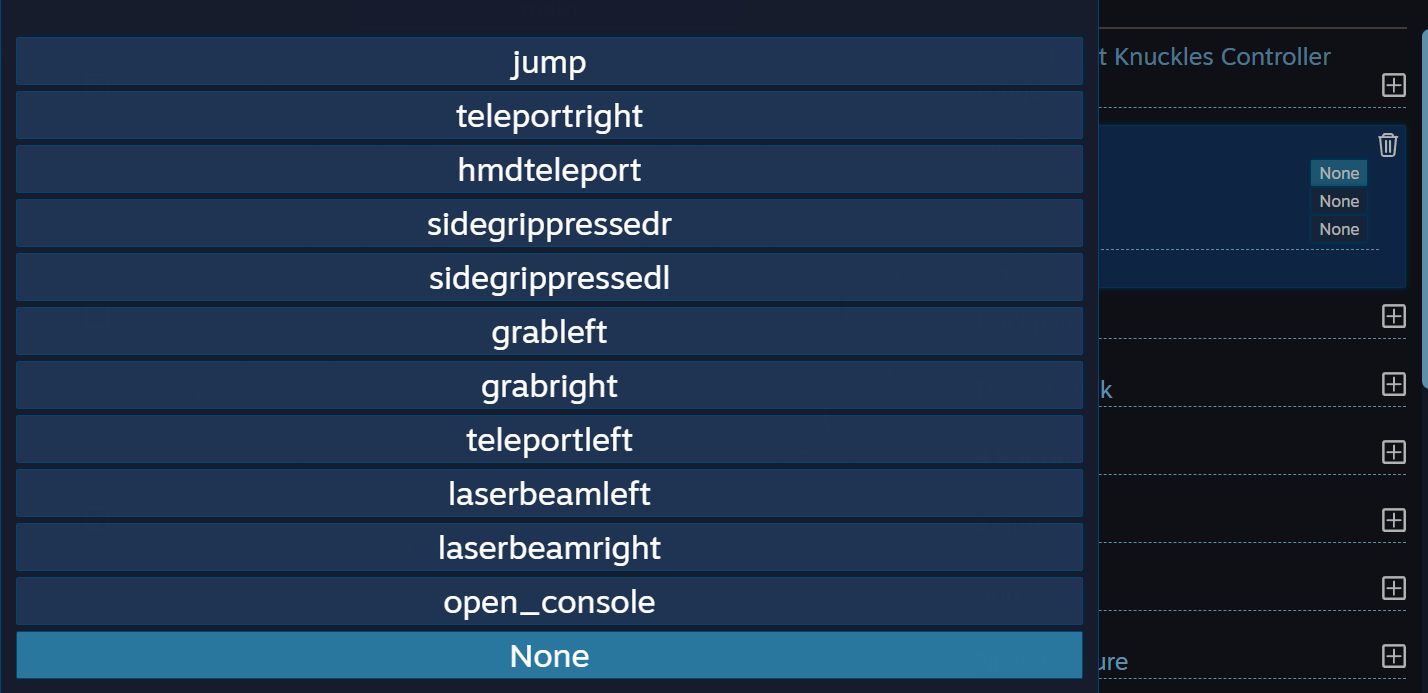
Clicking on a button or feature will let you map it to one of your applications input events / axis’s in the engines input settings. See below for an example of some of the events my template passes forward to SteamVR.
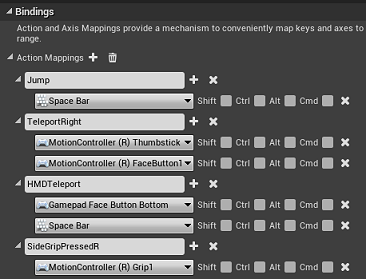
Selecting the trigger button and hitting + will give you an option of input types to assign to it. Here I have assigned it to a Trigger action type.
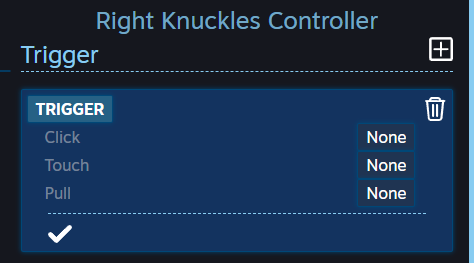
Then clicking on the “Click” event I am given the option to assign one of the engine input events that I have setup.
Then your engines event should fire when the controllers trigger is clicked. You can launch into your project (or get out of the VR menu overlay if doing this in VR) and test out the button.
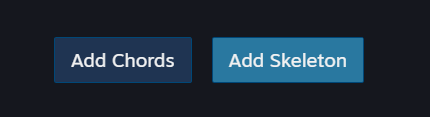
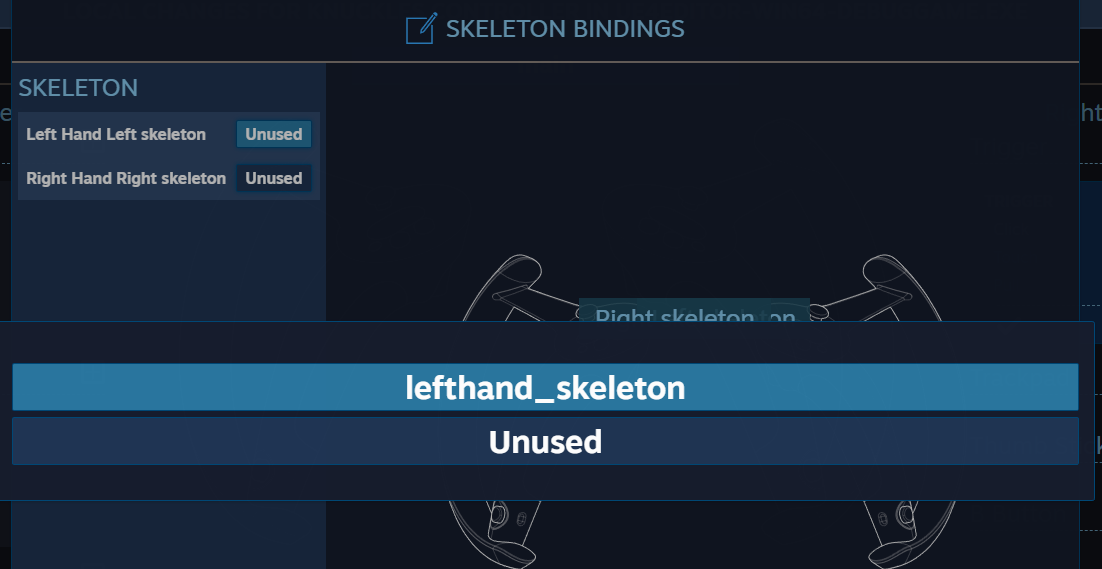
If using my OpenVRInput module then you will also want to assign the default skeletons it provides by clicking on below.
And then assigning the correct skeletals to each hand.
Once testing is complete and all mappings are done, you can export the mappings to the default controller bindings for your application by clicking on “ReplaceDefaultMapping”.

Congratulations, your controller type is now setup for SteamVRInput!
There is more advanced things you can do with it, but these are the basics.
3.Gesture Detection
The video in the first section goes over the gesture detection. I will flesh out an image based tutorial for it soon.
4.Hand Replication
Setting up the OpenInputSkeletalMesh to replicate is fairly easy. There are only a few relevant settings to deal with and the rest will be handled automatically. The mesh has a set of default quantization settings (I do not currently expose any advanced quantization settings) to compress the data.
Here are the settings:

| Replicate Skeletal Data | Tells the mesh component that it should replicate the skeleton. |
| Smooth Replicated Skeletal Data | If true, will lerp between the last two received poses over time. If you are using a very high update HTZ then this may be better turned off to save on CPU. |
| Replication Rate for SkeletalAnimation | The rate in HTZ (times per second) to send the skeletal data to the server (and then down to clients). As skeletal replication is inheiritly a bandwidth expensive process it is better to use lower values and use smoothing. You can tweak the rates and smoothing as you like until the bandwidth and quality is to your liking. |
| Replication Type | The type of replication to use:
Rep Curl Only: Only sends the finger curl values out, these can be used to blend between open/closed hand states and will generally be most used when holding something. Rep Curl and Splay: Sends both the finger curl AND splay values (currently no controllers send out valid splay values). Rep Hard Transforms: Replicates the actual transforms of the bones, if you are working with a mixture of VR plugins (like native oculus and steamVR) then this has to be used to send the full skeletal data as the SteamVR plugin has to be active in order to decompress its API data. Rep SteamVR Compressed Transforms: Replicates the API given compressed hand bone transforms, it appears to be a blend value between individual finger poses so it is significantly less expensive than my manual Hard Transforms mode can achieve. However the big downside is that all clients would have to be running through steamVR for it to work for them. |
5.Custom Skeleton Setup
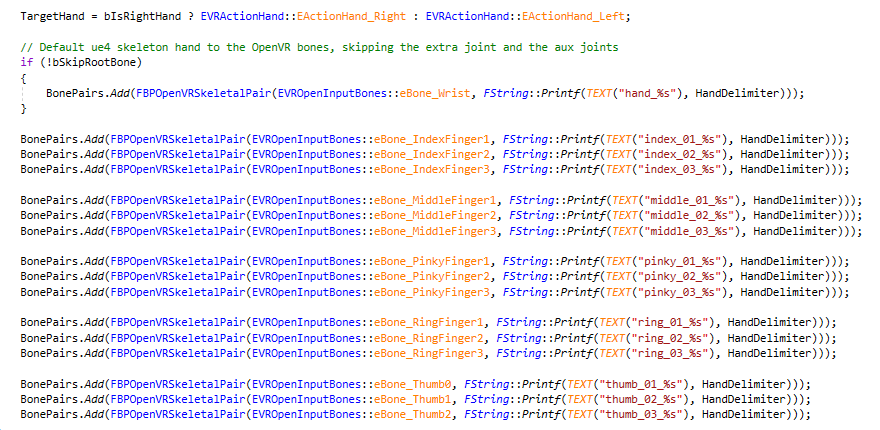
If you want to work with a custom skeleton and not re-target it to the UE4 one, then you can manually re-target bones in the ApplyOpenInputTransform node.
When you click on the node you will see the MappedBonePairs pin that is set to hidden by default, this is automatically generated for you if using one of the default options at the top (ue4 / openVR hands, left/right), however if create your own mapping here, then it will be used instead.
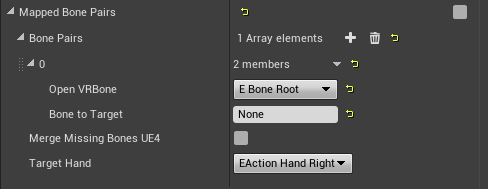
Just add an entry for every openVR bone and target it onto your equivalent bone. Below is an example of how the ue4 default mappings are created in code: